So you want to get started with mind mapping? And you are not sure how to get the best results fast?
Look no further. You found the solution. In the next five minutes, I will help you to get started and make your first mind map. You will learn the exact steps that make you feel proud of your mind map 🙂

We will go through 3 steps. These are:
- download and install mind mapping software (2 minutes)
- create a new map and add your ideas to it (2 minutes)
- create an effective mind map (1 minute)
One small thing to know before we start…
What is a mind map?
A mind map is a visual outline of information. Tony Buzan was the first to call this particular outline a mind map.
A mind map helps you to organize information. It uses keywords, colors, and images to do this.
A mind map is a very brain-friendly way of outlining information since it not only focuses on words. It also uses images and colors. These trigger other parts of your mind and memory. That is why a mind map is a good study and communication tool. It helps you to speak to your whole brain.

Study Routine: Smart Summarizing
A mind map consists of:
- A central image – this tells you the main idea of the mind map. The central idea is located in the middle of your sheet/document. Think of this as the title of a book.
- Branches radiate outwards from the center – The branches contain related information to the central theme of the map. You connect nodes of information to the center. The first level could be related to the chapters in a book.
- You can add more nodes to the branches – like sections and paragraphs in a book.
- Branches can never connect to another branch – this is one rule of mind mapping.
Mind maps can be created on a sheet of paper or on your computer, tablet, or phone. Today we have a look at digital mind mapping on your computer.
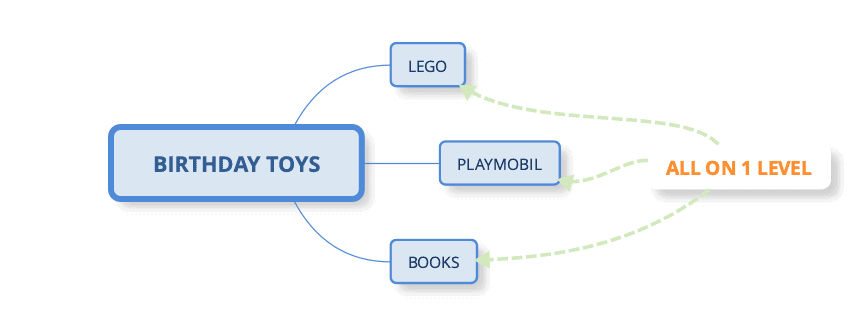
Here is all that information in a simple overview.
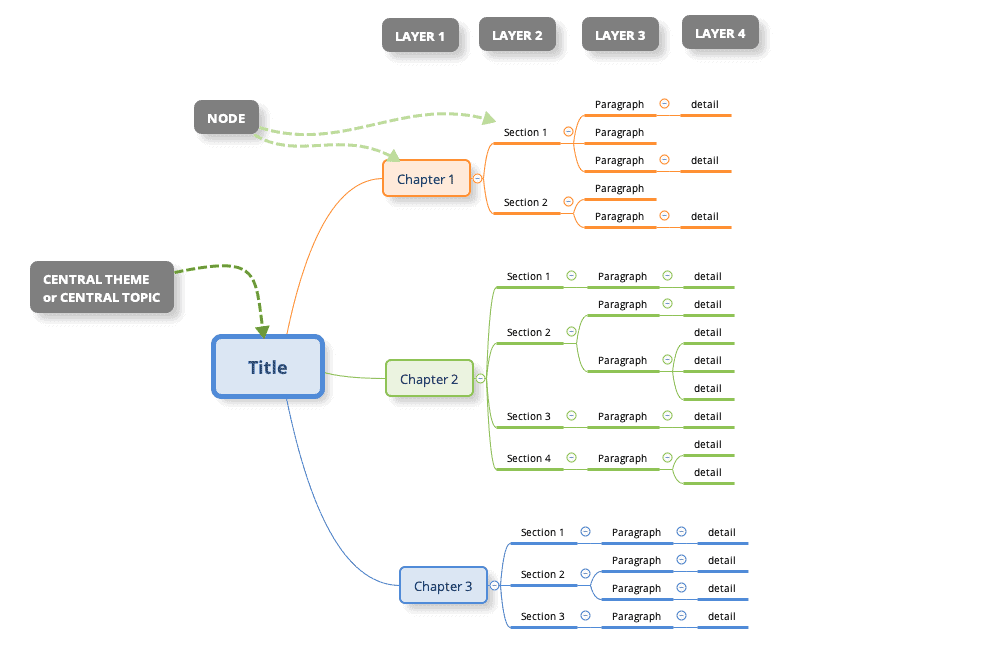
Can you see the resemblance with the root system of a tree?
Now that you know this… we have to move forward.
That’s right, 5 minutes until your first mind map. Below is a 3 step basic plan to help you create a basic mind map. Let’s go!

Step 1: Download and install Mind Mapping Software
A very good and popular digital mind mapping tool is Xmind. You can download your tool for Windows, MAC, and Linux here:
https://www.xmind.net/download/xmind8
(click on the above link first and start downloading. In the meantime you can read further)
This is version 8 of Xmind. You can use this tool for free (this is NOT a free trial! – Thank you Xmind 🙂 ). The only time you have to pay is when you need more powerful features. For now, you don’t need these features.
Install the software when the download is ready. Double-click and follow the onscreen instructions.
When the installation is ready, you move forward to step 2 where we will create a mind map together. What topic do you want to mind map about?
Step 2: Create a new map and add your ideas to it
Open Xmind. You will see something like this:
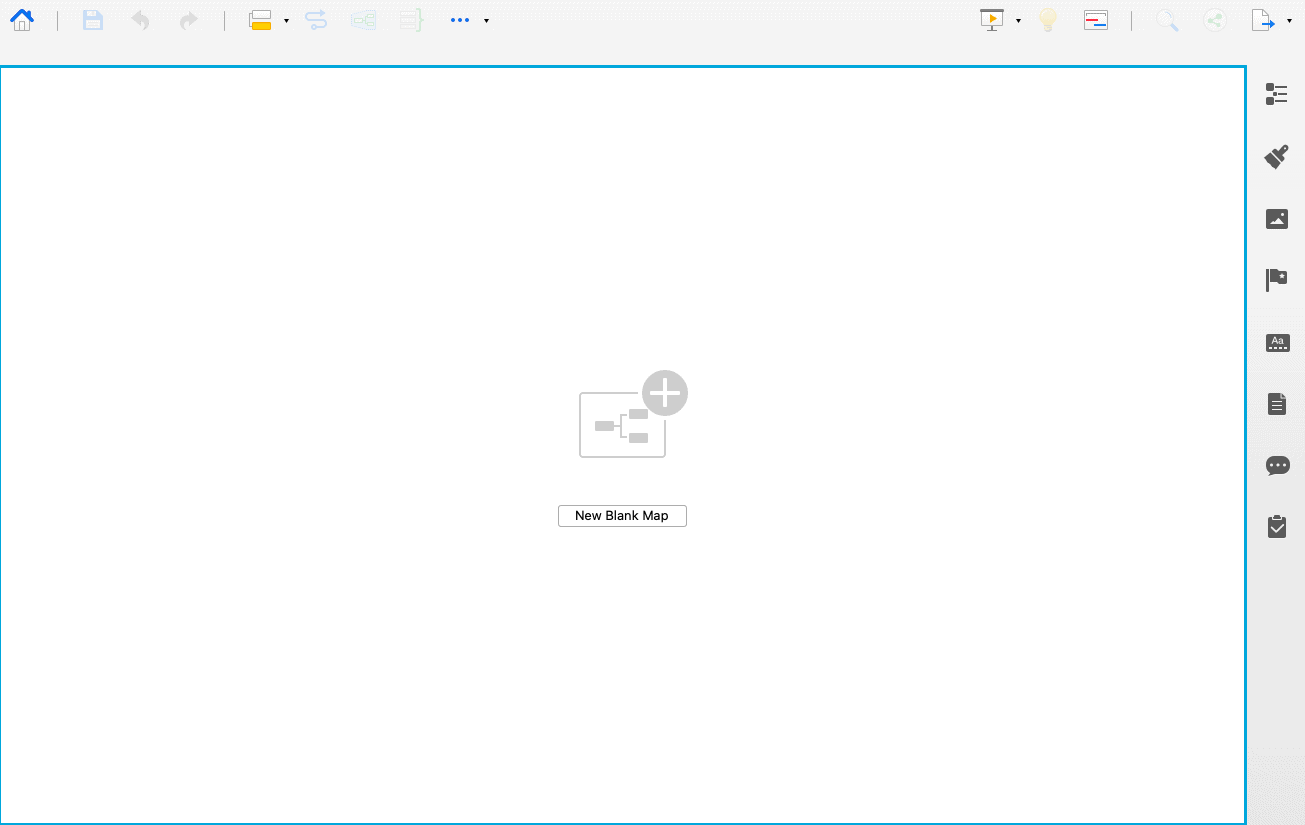
You click New Blank Map.
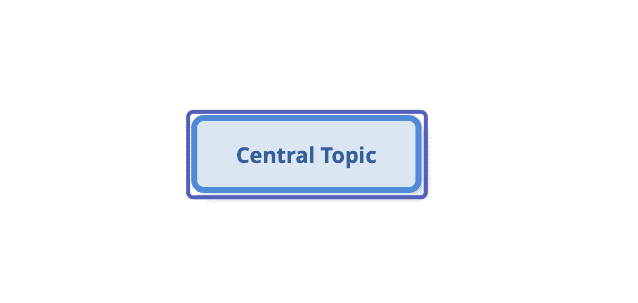
You start with a new blank page on your screen called “Central Topic”. This is the starting point of your map. Your entire screen is a large sheet you can use (and more if you zoom in or out).
As you can see there are two blue rectangles around “Central Topic”. The inner and lighter blue rectangle is the box around the center of the map. The outer darker blue rectangle shows you that this node or section of the map is active or selected.
Before you thoughts about what the topic of your mind map would be, right? What you can do is start typing. Use a few words. Don’t write full sentences! When you are ready, hit ENTER/RETURN to confirm.
The central idea of my map could be which toys to buy for the birthday of my children.

PRO TIP: The mapping rules say you should use a single word per node. When you want to write short phrases on a node, you have to limit the number of words per line. Otherwise, there is too much text on a single line. This is done by using CONTROL + <ENTER> while adding your thoughts to the map. Confirm using <ENTER>.
Next, I press the <TAB> key. This creates a new branch. Every time you want to add a deeper layer to your map, you press <TAB>.
Notice that the dark blue rectangle is around the newly created topic! In this new branch, I add the first type of toy. Again I confirm by clicking ENTER.
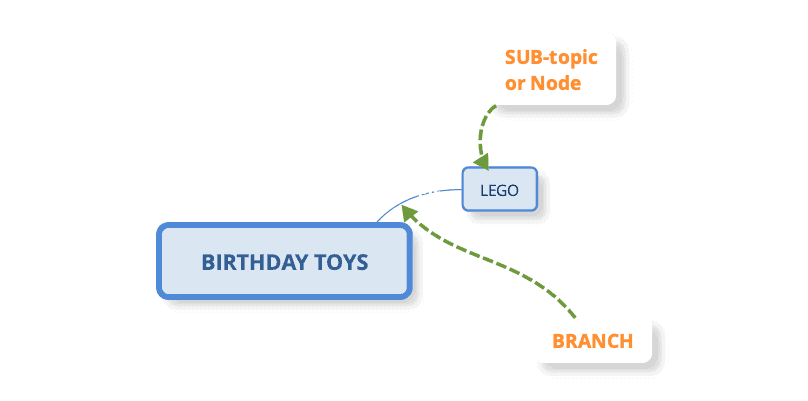
While still having the first node selected (the one I called LEGO), I click ENTER. Another node gets created on the same level as the LEGO node.
TIP: By clicking <ENTER> I can add nodes to the currently selected level. I add other types of toys.
Add the rest of your related ideas to your mind map. Remember that ENTER creates a node on the same level in the map. TAB creates a node on a lower level.
You have only one other thing to learn.
Step 3: Create An Effective mind map
You created your first mind map in Xmind! And all it took was a few minutes!
Congratulations!
We have about a minute left for step 3. In this step, you will improve your mind map. The result is hopefully a more effective map.
First a little information about an effective mind map. When is a mind map an effective map?
A mindmap is a means to an end. It helps you to clarify a lot of information using a simple outline or overview. Right now you may have a map with a lot of information. To make it more transparent, we (can) do four things:
- Add color to the map. Don’t go for the grey or light blue branches and text. Add some color! Select all nodes in a branch and change the color of the branch and the line under the word
- Is the outline good enough? Or can the map be more efficient if you change the order of the branches? Simply drag and drop the information to the right location on the map. You often know what to move around when you have all the information on your map.
- Highlight the important parts of the map or change the font size. This draws your attention to these nodes.
- Simplify. You might want to remove some words or shorten some sentences. You could even see that entire parts of the map can be removed! Less is More!
Here is a short clip of me doing these things:
Note that I started by saying you CAN take these four actions. No need to do them all! Just see what creates a clear outline of your information. The rest is something you can do later (add images, links, etc.).
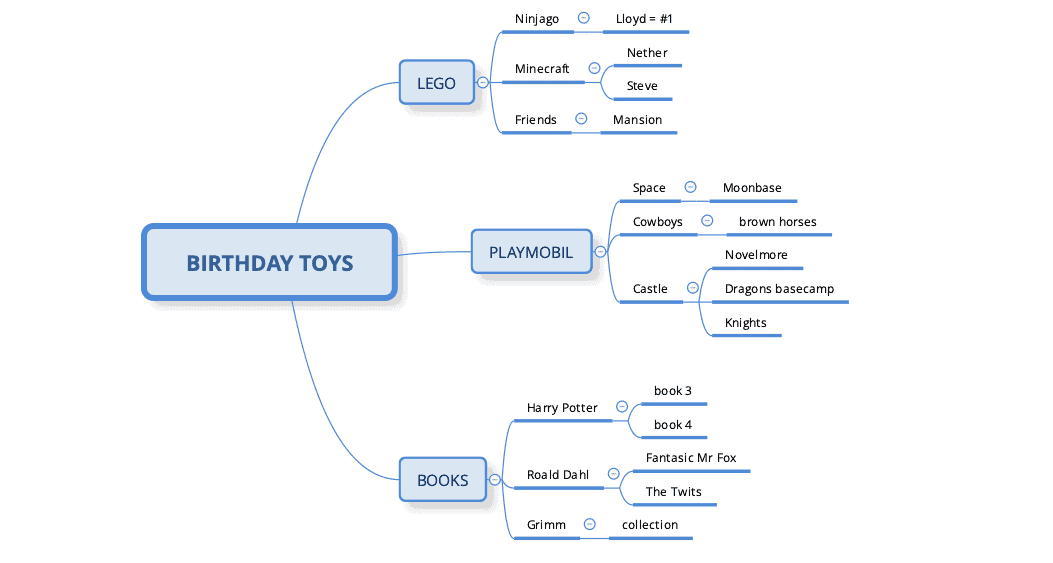
You changed an average mind map into a clear outline. Here is a visual comparison between the before and after step 3 actions:
before
after
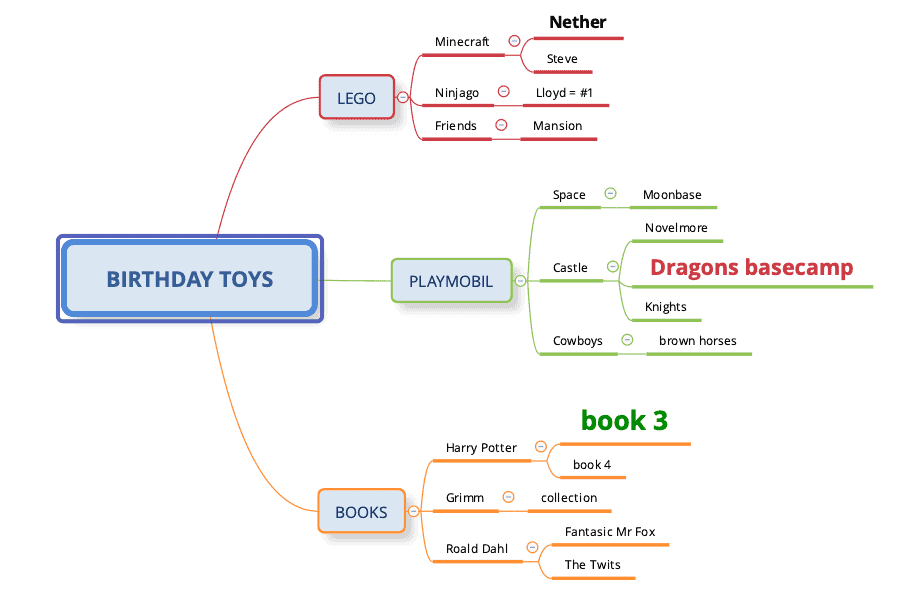
(click on the image to see the full mind map)
What’s Next?
For now, you finished your mind map! You made it (literally) 🙂
The main thing is you captured and organized your thoughts and ideas. Of course, you can add images to the map, links, and more. This takes a little bit more time than 5 minutes. If you like to, we can have a look at that together.
Be sure that you continue to use this map. Most mind maps are simply created and never looked at again. You should create a map, update it, edit it (relocate and remove), and use it again. This way you create a good and keep it up to date, ready to be used.
Study Routine: Smart Summarizing
Moving forward in mind mapping
As you can see, it is easy to create a mind map, even if you don’t have any software installed yet! Now you know how to transform your linear notes or thoughts into a clear map.
There is a lot more to mind mapping. Here are some things you can learn to do with links to relevant articles on the website.
Of course, you can do this on paper as well.
You can use different desktop software solutions, or work on your phone or tablet using an app.
There are different usages of mind maps. You can capture ideas and thoughts. Also you can take notes, create presentations, and brainstorm in groups. Here are templates and more instructions.
When you like to learn more about how others use mind maps, take a look at these mindmap examples:
When you feel you like to learn even more, I can help you with that. I have a special 1-1 workshop that enables you to go deeper into mind mapping. We have a private session that teaches you everything about mind mapping that you want to know.