You probably read more than one article about mind mapping. Perhaps you even created mind maps! Did you notice that a good mind map helps you to outline your information fast and easily?
The number one reason people stop using mind maps is not that it is too easy to use them. It isn’t that you benefit too much from them. Really… 🙂
The biggest reason people stop using them is that it is taking too much time. I mean, even more time than when they took normal notes, including the outlining benefit you get from mind maps.
That is why I like to share with you 3 ways you can start mind mapping in less time, probably making smarter mind maps. Let’s do this!
Don’t waste time on making the map look good
The number one thing people have problems with is the images in mind maps. They don’t like to draw. They waste too much time finding images online. They don’t like crop images until they look good.
ACTION 1: Make sure you only add images in the very last couple of minutes that you work on your map. This will save you a lot of time.
Do you know that most images either don’t add value or are just plain not needed to improve your notes?
The only images you should add are things like:
- Diagrams and graphs from a book
- Figures that explain or clarify a concept, idea, theory
- Screenshots or pictures of notes on a blackboard or screen.
The easiest way to add them is by simply taking a picture, or by making a screenshot. This way you captured everything you need. Plus you don’t have to look for the right image.
You drag the image into the mind map and drop it at the right location.
PRO TIP: You may even want to add the image to a new branch and hide it so you have the image, but it doesn’t clutter your map with too much information.
The first thing you should focus on when mind mapping, is adding keywords or short key phrases. Don’t even think about using one word only. If you need two, three, or five words… simply use them. Add them to the map and continue to move forward capturing your notes.
ACTION: Use color to highlight related information. This will give you an additional layer of understanding.
When you have multiple main branches on your map, you probably see that some words, phrases, or ideas are recurring all over the map. Highlight each related topic in your map with the same color. This gives you a better understanding of the map content.
ACTION: Last but not least… keep it simple!
When you keep things simple, it can save you a lot of time! And you also make it easier on yourself. Want to see something that has an impact but is also simple?

*: ImageTrademark Registered for Super Mario Bros, the Coin Sound
Keep this in mind. A mind map will help you to outline. Don’t use it to outshine!
Create a map once, update it along the way
As I wrote about before, you have to keep things simple. That is also when you create your first draft of a mind map. That is why I recommend this:
ACTION: Create the first draft of your mind map as quickly as possible. Take for example 2 minutes to outline your information, no more.
This way you will save time, and you still capture over 90% of the information you need. Don’t fill a map with too much information.
So now you are going over your book. You add new information. The first tip… don’t start new maps all the time. Update the maps you have.
Here’s how…
Imagine you are reading your study book. You see something interesting that you want to add to your mind map.
Locate where it should be added, and then add it.
Continue reading your book. Add new information where needed.
ACTION: Add new information by taking notes from your book. Make the map a clear overview of what you covered in the book.
Then, when you understand your notes well enough, you can think about removing part of your map.
That’s right! You remove information! That is not a problem since you understand and probably already memorized the information. This is shown in the map by removing the information or greatly reducing the section that deals with it.
ACTION: Don’t be afraid to remove information from your map when you don’t need it anymore. This often happens when you understand or memorized the information. It can also be that the basics are understood and you added deeper levels of knowledge.
Another thing that you might want to do is re-organizing.
When you added a lot of information, the map may be in need of a new structure or outline. You move all related information into their own branches. The map will change. Branches can be merged or broken up into other main branches.
ACTION: Always check if the outline you create is the right one. If not, re-organize the mind map to make it clear again.
REMEMBER: You don’t need to create new maps all the time. Build upon your current map and update it accordingly.
Keep things simple!
Stop wasting time when mind mapping.
The moment you are taking too much time to find an image, or you start staring at your map, this is a good sign to move on. Put your nose back into the book and start taking notes on the map.
Mind mapping isn’t difficult. But as with all study tactics and study skills, you need to use it with focus. Combine that with the easy-to-understand rules of mind mapping, and you are on your way to understanding and clarity in your studies.
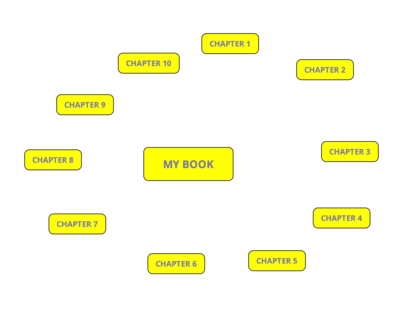
For instance… You can create a mind map from your entire book. That’s right, one mind map for one book.
What you will notice is that you probably need to make a mind map for each individual chapter. The benefit of doing that is that the map is still easy to read and understand.
If this means you end up with 10 mind maps for one book, no problem!
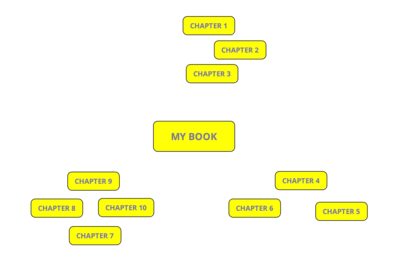
Simply hang all the mind maps on your wall and put them in the right order. This could be like the chapters outlined in the book. Or you could group everything by topic and end up with perhaps 3 groups of 3 or 4 mind maps.
As a bonus, you could be creating what is called a master mind map. This is a map that shows you all the main topics per chapter. I usually create a master mind map with all the chapter titles, and then 3 to 7 conclusions or main points in each chapter’s branch.
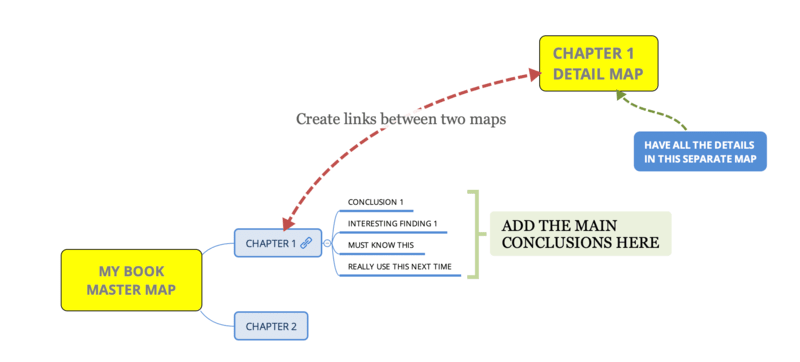
This way I have all the important information on 1 map (my master mind map). When I need more detailed notes, I can go to my individual chapter map.
Again… keep things simple. Learn to USE a mind map. Don’t fall into the rabbit hole that can be called “pretty mind map creation”.
Oh… when you create a master mind map on your computer, you can create hyperlinks between the maps.
To make sure you get the most out of this…
Study Routine: Smart Summarizing
Remember this when getting started with mind mapping, the practical way
The first thing you have to remember is that mind mapping is just a tool. It can be a very powerful tool, but it is just a tool. Treat it as such!
Don’t try to create a great-looking map. Aim for creating a very clear map with the information that you are studying.
Next, use words first (and only) to create a mind map fast. You may want to add some color by highlighting text in the map. This will help you to identify inter-branchial (is that even a word???) information, so information that is located over multiple branches.
Most of all:
- Keep things simple
- Mind map fast
- Re-organize your information to reflect the best possible outline of your information
- Don’t try to make nice looking mind maps, but create insightful maps
When you do that, you will be able to make great maps that help you forward when studying!
If you have any questions about this, let me know.
And if you really want to improve your study skills, have a look at the Studying Made Easy training.
Happy mind mapping!